If you mainly deal with cash sales in a retail environment you will usually have a high volume of sales at a lower value making entering these as individual sales a long task. To solve this, we have a recommend method for using KashFlow for cash and retail based businesses. The example below is based on a shop owner but works well for other companies who handle primarily handle cash.
Setting Up
Step 1 – Creating bank accounts for your tills/cash on hand
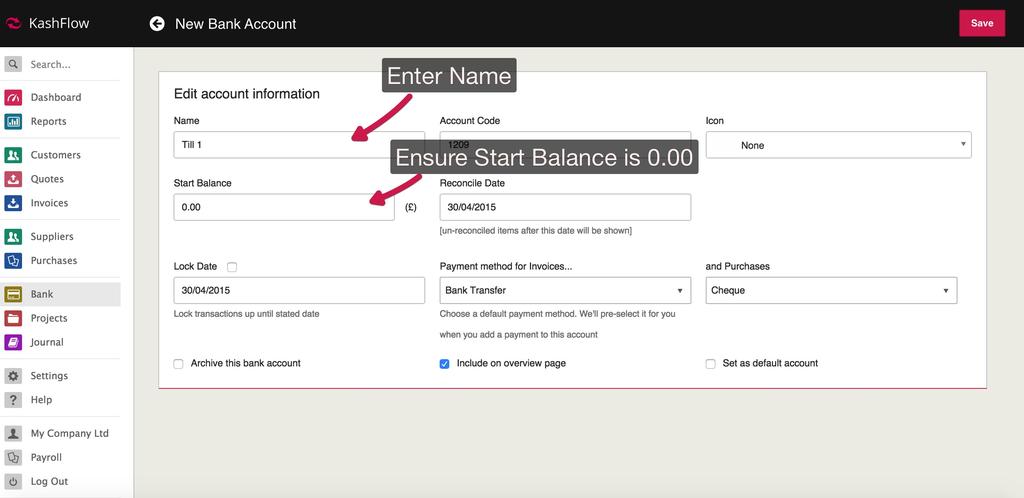
To start, go to Bank > Add A New Bank Account > Create a new bank account named ‘Till 1’ or ‘Cash on hand’. This will represent the amount of cash that you should have on the premises or in your till.
The three crucial fields are;
- Account Name – This should easily identify the bank account
- Reconcile Date – This should be a date before the first transaction. To make things easy we advise that you enter 01/01/1970 here.
- Starting Balance – This should be 0.00
If you have more than 1 till you can set up as many of these bank accounts as required. Similarly if you have a safe where you hold the money before you bank it you should set that up as an additional bank account.
Step 2 – Creating the tills to record takings
As KashFlow requires invoices to be raised and for these invoices to be associated to a customer, we advise creating individual till accounts as customers to allow you to keep track of your takings easily.
You can do that by going to Customers > Create > Create a new customer called ‘Till 1’. If required set up a new customer for each of your tills. Your now ready to start recording takings.
Recording Takings
To record takings go to Invoices > Create. As the customer, select the appropriate till. Add a line item to record the takings, using the total box enter in the amount of money that was in the till. If you want to record VAT on these sales, select a VAT rate. The Net Rate and VAT Amount will then be reverse calculated. When you’re done, click Add Item.
Using the payment details section, record the amount of money that’s in the till.
- Click Add Payment
- Use the Amount box to enter the amount of cash that’s in the till.
- Use the Account box to select the till/cash in hand account
- Use the Payment Method to select cash
The payment has now been recorded against this till.
Recording Banked Takings/Safe Transfers
The last step is to record your banked takings or transfers to the safe on your premises, this will keep all your accounts reconciled and also let you keep track of the amount of cash you’ve got.
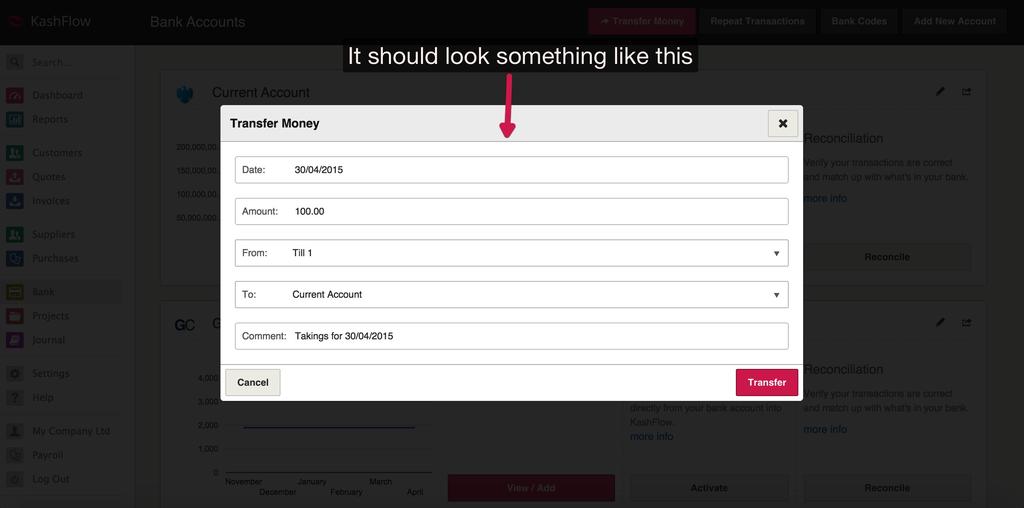
To do this, go to Bank > Transfer Money. Using the options here;
- Date – Enter in the date that you banked this money or took the money from the till and put it into the safe
- Amount – Enter in the amount banked/transferred
- From – This will be the till account
- To – This will be your standard business current account or the safe account
- Comment – to make this easy to reconcile you can enter in something like ‘Takings w/e 01/01/2013’ or similar.


